How to get downloads to show at bottom of chrome
With the steadily developing advanced scene, internet browsers have developed to furnish clients with improved functionalities and adaptable highlights. Google...

With the steadily developing advanced scene, internet browsers have developed to furnish clients with improved functionalities and adaptable highlights. Google...
In our high speed computerized world, the comfort of web based banking has upset the manner in which we deal...
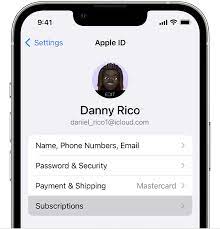
In the present computerized age, memberships have turned into a basic piece of our regular routines, offering comfort and admittance...
In the present advanced age, versatile installment applications have changed the manner in which we handle monetary exchanges. Cash Application, one of the most famous installment stages, empowers clients to send, get, and oversee cash easily. Notwithstanding, similar to any web-based stage, there may be occasions when you really want to obstruct or unblock somebody in light of multiple factors. Unblocking somebody on Money Application is a basic cycle that permits you to restore correspondence with a formerly obstructed client. To do this, open the Money Application and explore to the "Movement" tab. Search for the "Obstructed" list, which shows generally hindered contacts. Select the individual you wish to unblock and tap on their name to get to their profile. Inside their profile, tap the "Unblock" choice, and affirm your choice when provoked. Subsequently, the individual will be unblocked, and you can send and get cash or messages to no one's surprise. Continuously twofold check prior to unblocking to guarantee a positive encounter. Source: Candid Technology In the event that you wind up in a circumstance where you really want to unblock somebody on Money Application, fret not! In this blog, we will direct you through the cycle bit by bit. 1. Understanding the Block Element on Money Application: Before we dig into the unblocking system, it's fundamental to understand how the hindering component deals with Money Application. At the point when you block a client, they will not have the option to send you cash or make any installment demands. Also, any continuous installment memberships with the obstructed record will be dropped. It's pivotal to consider the ramifications of unblocking somebody as you continue. 2. Getting to the Money Application: The initial step to unblocking somebody is to get to the Money Application on your cell phone. Guarantee you have the most recent variant of the application introduced to approach the most forward-thinking elements and functionalities. 3. Signing In: Once the application is sent off, sign in utilizing your qualifications, including your enrolled telephone number or email address and the related secret word or PIN. 4. Getting to the Profile Page: Upon fruitful login, explore to the profile symbol, commonly situated in the upper left or upper right corner of the screen. Tap on it to open your profile page. 5. Opening the Protection and Security Settings: Inside your profile, find the "Protection and Security" settings choice. Contingent upon the application's design, it could be under "Record Settings" or a comparative segment. 6. Overseeing Hindered Records: Inside the "Protection and Security" settings, you'll track down the choice to oversee obstructed accounts. Tap on it to see the rundown of right now impeded clients. 7. Recognizing the Client to Unblock: In the rundown of obstructed accounts, find the client you need to unblock. Make a point to twofold check their username or show name to try not to unblock some unacceptable individual. 8. Starting the Unblock Cycle:...
Overseeing Mastercard obligation can be a difficult errand, particularly when exorbitant financing costs begin to collect. Notwithstanding, with an essential methodology, you can exploit Mastercard balance moves to oversee your funds. In this thorough aide, we will investigate the intricate details of charge card balance moves, giving you important experiences and tips to guarantee a fruitful exchange and an obligation free future. Source: CreditMantri To begin, examination and contrast Mastercard offers with track down the best arrangement that suits your necessities. Guarantee you grasp the terms, expenses, and span of the limited time rate. Then, start the exchange adhering to the guarantor's directions, and your excursion to independence from the rat race starts! Keep in mind, restrained spending and convenient installments are critical to capitalizing on this methodology. By exploiting balance move shrewdly, you can set aside cash, improve on your monetary life, and make ready towards an obligation free future. Understanding Visa Equilibrium Moves: A Mastercard balance move includes moving the exceptional equilibrium starting with one charge card then onto the next, regularly with a lower loan fee or an early on 0% APR period. The essential objective of an equilibrium move is to save money on premium charges and pay off the obligation quicker. Picking the Right Equilibrium Move Card: To start an equilibrium move, first, you should choose the right Mastercard. Search for cards with a long 0% APR initial period and low or no equilibrium move expenses. Try to analyze different cards, as terms and advantages can shift altogether among various monetary foundations. Surveying What is going on: Prior to continuing with an equilibrium move, lead a careful evaluation of your monetary circumstance. Guarantee that you possess the ability to make convenient installments on the new card. Additionally, consider your FICO rating, as this will influence the endorsement and terms of the equilibrium move. Planning for the Equilibrium Move: To smoothen the exchange cycle, assemble all the fundamental data about your ongoing Mastercard and the exceptional equilibrium. Whenever you have chosen the new card, apply for itself and anticipate endorsement. Starting the Equilibrium Move: Upon endorsement, contact the new Visa guarantor and furnish them with the subtleties of the equilibrium move. They will organize with your past Mastercard guarantor to finish the exchange. This might require a couple of days, so keep checking the two records during the interaction. Taking care of the Equilibrium: After the equilibrium move is finished, center around taking care of the moved equilibrium at the earliest opportunity. The early on 0% APR time frame gives a fantastic chance to make significant installments without bringing about extra interest charges. Make a financial plan and dispense additional assets towards obligation reimbursement. Staying away from Normal Entanglements: While Visa balance moves can be worthwhile, they can likewise prompt a few entanglements in the event that not oversaw accurately. Keep away from these normal mix-ups: 1. Missing Installments: Ideal installments are critical during the starting time frame. Missing an installment might void the 0% APR and result in exorbitant interest charges....
Introduction PAYDAY 3 has taken the gaming world by storm with its intense heists and thrilling co-op gameplay. As...
TikTok Live has surprised the online entertainment world, offering clients an intelligent and connecting method for associating with their supporters...
Z Landmarks, a progressive multiplayer internet game, has surprised the gaming scene. Its exceptional combination framework permits players to consolidate...
Introduction: Taylor Swift, the Grammy winning superstar, has a massive and devoted fan base. As her popularity soars, getting access to her exclusive events and concert tickets has become increasingly challenging due to overwhelming demand. However, there is a solution: becoming a Verified Fan. This coveted status provides genuine supporters with unique opportunities and priority access to Taylor Swift's concerts and other special events. In this blog, we'll walk you through the steps to become a Verified Fan and join the inner circle of Swifties. Source: Los Angeles Times Step 1: Register for Taylor Swift's Official Website and Fan Club: To get started on your journey to becoming a Verified Fan, head over to Taylor Swift's official website and register for an account. This is a crucial step, as it will grant you access to exclusive content and announcements. Additionally, consider joining Taylor Swift's fan club, which often provides early access to concert tickets, exclusive merchandise, and behind-the-scenes updates. Step 2: Follow Taylor Swift on Social Media: Stay connected to Taylor Swift's social media accounts, such as Twitter, Instagram, and Facebook. She frequently posts updates and exciting news about upcoming events and releases. Being active on her social platforms also demonstrates your genuine interest in her music and career, which can increase your chances of becoming a Verified Fan. Step 3: Interact and Engage: Show your love and support for Taylor Swift by actively engaging with her content. Like, share, and comment on her posts to demonstrate your dedication as a fan. Engaging with other Swifties on social media can also build a sense of community, and who knows, you might make new friends who share your passion for Taylor's music. Step 4: Participate in Contests and Promotions: Keep an eye out for contests and promotions organized by Taylor Swift's team or her partners. These events often offer exclusive opportunities to meet Taylor, attend a private event, or secure early access to concert tickets. By participating in these activities, you not only increase your chances of winning special prizes but also show your commitment as a true Taylor Swift fan. Step 5: Attend Concerts and Shows: Support Taylor Swift by attending her concerts and shows whenever possible. Verified Fan status is often granted to those who have a history of attending her events. Ticket purchases made through official channels and with your registered account can contribute to your Verified Fan status, proving that you are genuinely invested in experiencing her live performances. Step 6: Pre-order Taylor Swift's Music and Merchandise: When Taylor Swift releases new music or merchandise, consider pre-ordering through official platforms. Pre-orders can be a significant factor in earning Verified Fan status, as they showcase your loyalty and genuine interest in Taylor's latest offerings. Step 7: Watch Out for Verified Fan Registration Periods:...
Pokémon GO, the ridiculously famous expanded reality portable game, has enthralled players overall since its delivery. The game permits players...