


While such countless organizations are centred around making content for stages like Facebook and Instagram, LinkedIn offers a huge load of chances for associating with different organizations. By sharing important experiences or discourse, you can develop consciousness of your image incredibly.
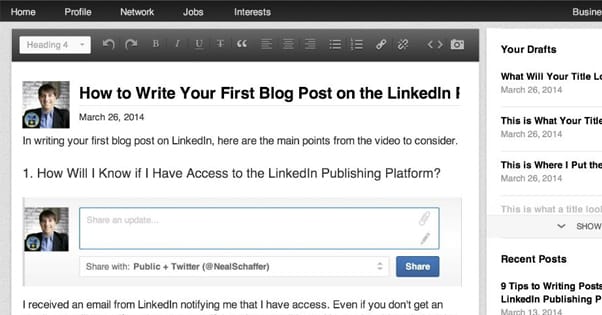
To make an article or blog, start by signing in to your LinkedIn account. Close to the highest point of your landing page, click Write an Article. This will raise LinkedIn’s inherent distributing instrument. This one page has all that you want to make an article that you can impart to your organization and it’s quite simple to utilize.
Where it says the feature, you can type in the title of your article. I will refer to mine as “Lord of Prussia Real Estate Market Update.” Underneath your feature, you’ll observe the body area. To begin composing your genuine article, essentially start composing. Or on the other hand, on the off chance that you’ve effectively composed the text part of your article, you can preorder it here.
Up at the highest point of the screen, you’ll see you can change your text style by tapping the drop-down menu that says Normal. You can utilize this to make subheadings, or simply add additional accentuation on specific pieces of your article. You can likewise make your text intense, emphasized, or underlined.
These next two buttons will permit you to make bulleted records. To one side of those, you can tap the twofold statement symbol to make block statements, which are indented and emphasized. What’s more, you can tap the symbol to one side of the statements to embed a connection.
Notice that, when you’re composing text into the body of your article, there’s a square symbol with somewhat, in addition, to sign at the base. This square follows you as you type. By tapping on this symbol, you can add a picture, video, slides, or a connection to your article. Simply make your choice, and afterwards adhere to the directions on your screen. To add another thing, basically hit the Enter key to make another line, and afterwards, click the symbol once more.
Over your feature, you’ll see an outline of two photographs with one or more signs. Click this to transfer your cover photograph. Your cover photograph shows up at the highest point of your article, just as when your article is shared across LinkedIn or around the web.
At the highest point of the screen, you’ll see the word Saved. Like Google Docs and practically some other web-based distributing apparatus, LinkedIn consequently saves your work each time you make an altar. To complete your article later, all you want to do is to return to the proofreader and snap the Drafts button. Then, at that point, click the name of your article from the menu that springs up and keep on chipping away at it.
At the point when you’re completely set your article, click the Publish button in the upper-right corner of your screen. There’s only another progression before your post goes live. In the container that springs up, type in a short depiction or mystery for what you composed. For instance, you could say, “Here are my contemplations on the current neighbourhood housing market.” When the post appears in your devotees’ feeds, this text is the main thing they’ll see, so make certain to establish a solid connection.
Congrats! You’ve quite recently distributed your first article on LinkedIn. A crate will spring up that permits you to message individuals in your organization with a connection to your article, or to share it on other web-based media stages. You can likewise snap to get a connection to your article, which you can share on your blog, through email, instant message, or elsewhere you’d like.


