


The corona quarantine gave us a whole lot of time to try things no one ever thought of doing. The first wave of it got people into the kitchen with the trend of dalgona coffee. While people were getting bored with nothing to do, it was a time of experimenting for tech nerds.
If you are a tech-head, you have head to just the right webpage. Here is where you will learn How to build up your own computer.
Build your own computer with the following steps.
Here is what you need-
The kind of PC you want to build (even if it’s for office work or for gaming) will not matter. Some basic components will always be the same. You will need a motherboard, a CPU, a power supply, and a monitor.
Other components you will need will be- Motherboard, Processor, Graphics cards, Memory, case, and an Operating System. Additional components will be- keyboard, mouse, speakers, etc.
How to put it all together?
Going into the roots of framing a computer will do us no good. The internals of a computer is very complicated and is different for every computer. So we will talk about how to put a computer together generally.
The first step to set up a computer will be to clean the space to set it up. This can be either your storage room. The components you will buy for setting up your PC will come with an instruction manual. You should start with the mother of all the components, the motherboard. The instructions for setting a motherboard can be a little intriguing. If you look at it the other way, the motherboard is a lot like a Lego set.
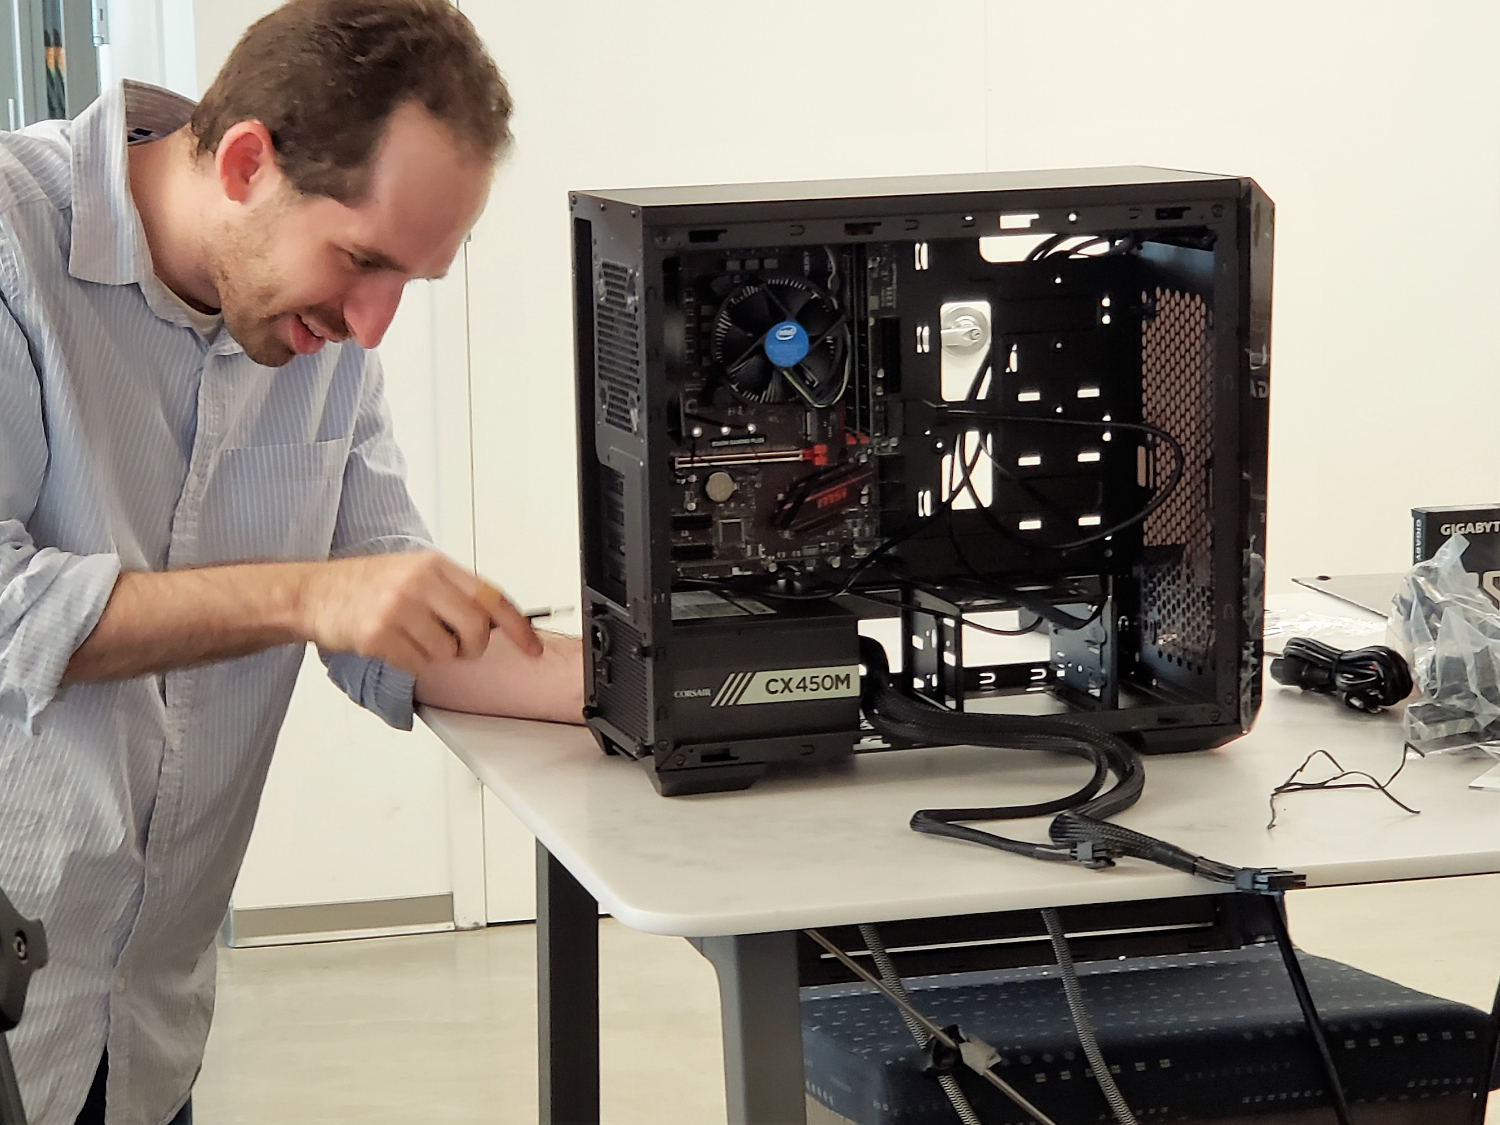
Make yourself safe
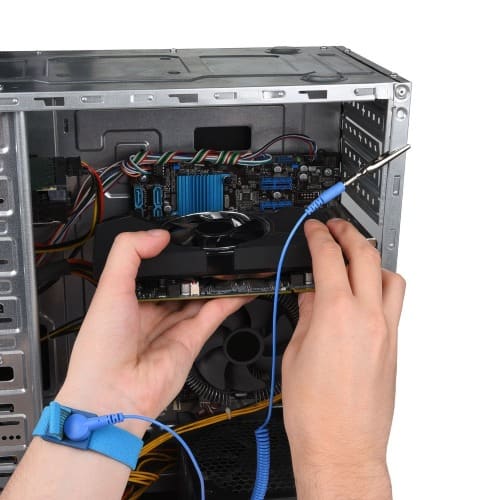
Wrap an antistatic wrist-strap cable around your arm. It will prevent electrostatic discharge which can be really dreadful to computers.
Start the Unscrewing
With your handy screwdriver, unscrew the side panel.
Work with the power supply
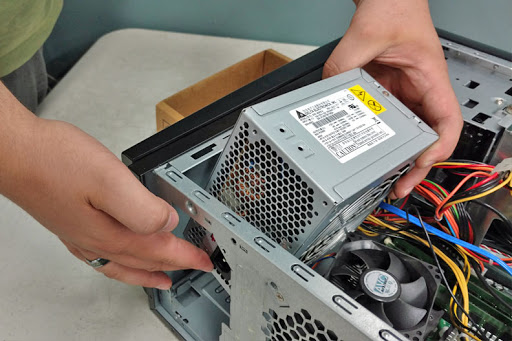
A few cases accompany the power-supply as of now introduced, while others will expect you to buy the power-supply independently and install it on your own. Ensure that the power supply is gracefully installed in the right direction and that nothing is hindering the power supply’s fan.
- Generally, one should place the power supply around the top or the bottom rear of the case. You will easily be able to figure out where the power supply should go by discovering an empty section on the back of the case.
Make the motherboard family

If you are really enthusiastic about installing your PC, this will probably be the most fun part for you.
- Find the processor port on your motherboard and attach the processor. There will be an indicator present on your motherboard and CPU which will show you the right way to put it.
- Find the RAM slots and insert the RAM with care, they will fit just one way. This step should Attach your RAM to the motherboard.
- The next step is to pin your power supply with the motherboard’s power connectors.
- This step will come later but should be done prior. Discover the SATA port of your motherboard’s hard drive.
A little art time with Thermal Glue
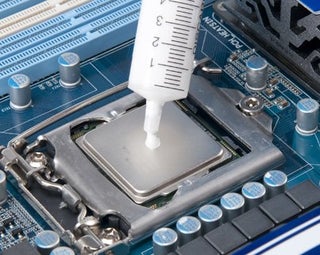
If you feel it is required, apply a little of Thermal Glue on the CPU. Lay a soft hand while you do that since putting a little too much glue can create a mess. If you do it, you can risk getting paste into the motherboard socket. Now this will not only lead to a short circuit but also make your motherboard less valuable if you ever plan to sell it.
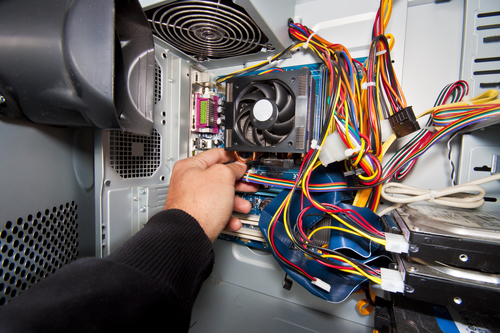
Now comes the Heat Sink
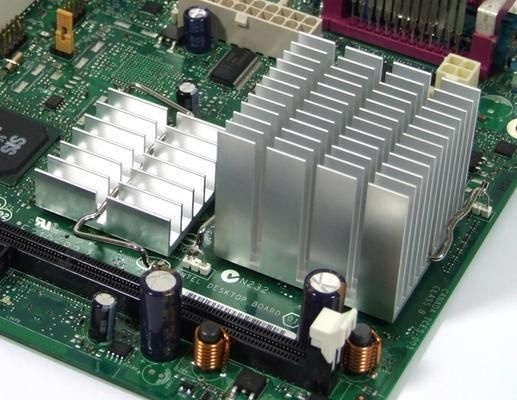
This process will vary with different heat sinks. You must read the instructions before starting up the process.
- Generally, coolers have their place just above the processor and are clipped into the motherboard. We’re pretty sure yours will be the same.
- In some cases, Heat Sinks also have brackets that you can attach underneath the motherboard.
- Completely ignore this step if your processor is already having a Heat Sink.
Get your case ready
Knock the plates of your case to fit components into the proper positions.
- In case your case has different shelving units for hard drives, configure the units using screws.
- The first thing you probably will have to do is install and wire your case’s fans. It will be an easy task if you follow your case’s fan installation instructions.
Make the Motherboard secure
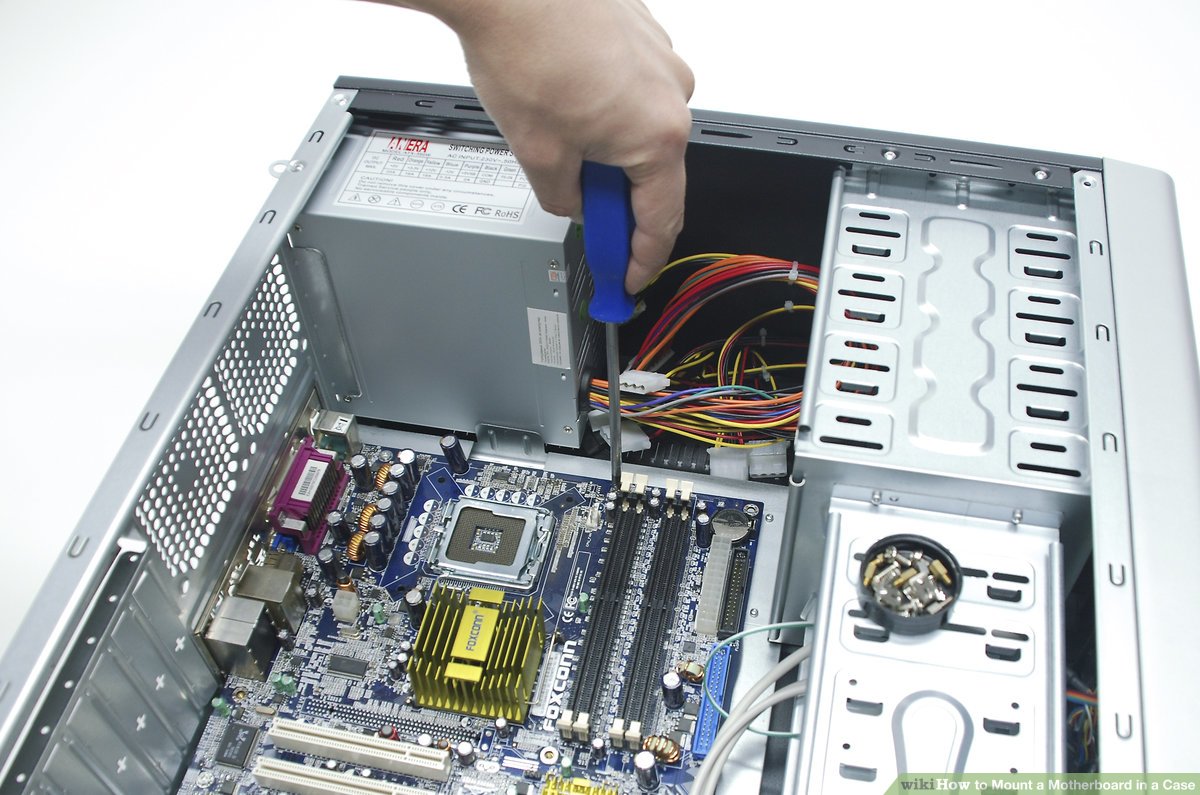
Once you are done with installing all the components, gently position the motherboard on the backside of the case. The ports will attach themselves like missing puzzle pieces. Screw the screws of the motherboard to fix it.
Connect the case connectors

You will find the connectors on the front of the case. Your motherboard’s instructions will guide you on how to connect the USB ports, the Power and Reset switches, the LED power and hard drive lights, and the audio cable.
Place the hard drive

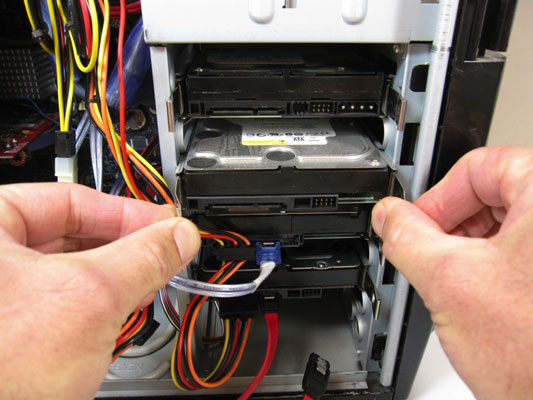
Although this procedure will highly depend on the kind of case you have, generally should go this way-
- Remove front panels
- Place the hard drive in the hard drive slot. Typically, it is present at the top of the case.
- Screw the screws to keep the hard drive intact.
- Attach the hard drive’s SATA cable into the SATA slot on the motherboard.
Connect Power Supply to other components (if any)
There might be some other components that will need a power supply. Be sure to connect them to the following-
- Motherboard
- Graphics card(s)
- Hard drive(s)
Congratulations! You can finish the computer assembly
After carefully walking through the process you can now sum it up. All you have to do is examine if none wires hinder circulation and bam you can then close it up.


