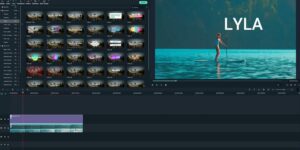
This guide will tell you some of the basics on how to use Filmora, such as how to edit video, add transitions, and adding text.

Opening a project
- Open Filmora and choose which aspect ratio you would like to edit here.
- Choose New Project. If you want to open an existing project, you can select Open Project or browse your project library.
Importing media
- To add media, simply drag and drop files into the timeline. You can find your imported clips under Project Media in the media section. The clips will show their file names and thumbnails.
Navigating the timeline
- You can zoom in and out of the timeline by clicking and dragging on the slide on the right-hand side of the screen.
- On the timeline, there are video tracks for all visual content and audio tracks for sound content. Videos with audios attached are collected inside the video track only, but you can separate the video and audio by right-clicking and select Detach Audio.
- Your video preview window plays your edit. Move the red play head to play from different points of the timeline.
- The lock button locks the track to prevent modification. The eye button disables the track. Add or remove tracks by using the Manage Tracks button.
Editing on the timeline
- To move a clip, just click and drag. You can move within a track, or move a clip to another track. The clip on the top video track is always shown in the Above Tracks place below.
- On Windows, use Ctrl + Z to undo any changes that you make. On Mac, use Command + Z.
- To adjust the clip length, click and drag from its edges.
- To split a clip into pieces, place the red play head on the point you would like to cut and click on the scissor icon. The clip will now be split into two separate clips which can be moved and edited independently.
Adjusting clip properties
- Double-click on a clip to adjust the properties. There are several sections to this, such as Video, Audio, Colour, and Animation. You can enable and disable each by using the checkmarks.
Adding titles
- Select the Titles tab to add titles to your video.
- Click on any ready template to import a new text clip on your timeline here. This can be moved and edited just like the other clips.
- Click on the clip to get the Text Properties section and adjust text, font, colour, and other properties.
- You can also add motion to the text by heading to the animation tab.


