

In this guide, we are going to tell you how to use OBS by going over display capture, setting up scenes, starting a recording, and we will also touch on audio and other settings. OBS is available on both Windows and Mac, and is almost identical on both operating systems.
Display capture
- If this is your first time using OBS, your screen capture area should be black, which means that you need to set up a source. To do this, on the bottom, select the plus sign and choose what source you want to use.
- Display Capture will capture anything that is showing up on your display, Video Capture Device will show your webcam or a connected video-capture device, and Window Capture only captures what is currently in the window, like a video game or a web browser.
- For now, choose Display Capture, which is one of the most common choices. This is used to record your screen and save it as a file for editing later.
- Choose Display Capture, and you will have an option to label the source. Before you confirm, make sure that you choose Make source visible and then click on OK.
- If you have multiple monitors, click on Display and choose what monitor you are going to record.
- After you choose it, make sure to mark if you want your cursor to be captured by clicking on Capture Cursor and then on OK. You can also crop your recording area to your desire by adjusting the scale and dragging the corners.
- Another source example is Game Capture, which will only the game screen of your choice. Head over to Sources again and click on the plus button, then Game Capture.
- Click on Make source visible, and then OK. After this, choose what mode you would like, and then click on OK.
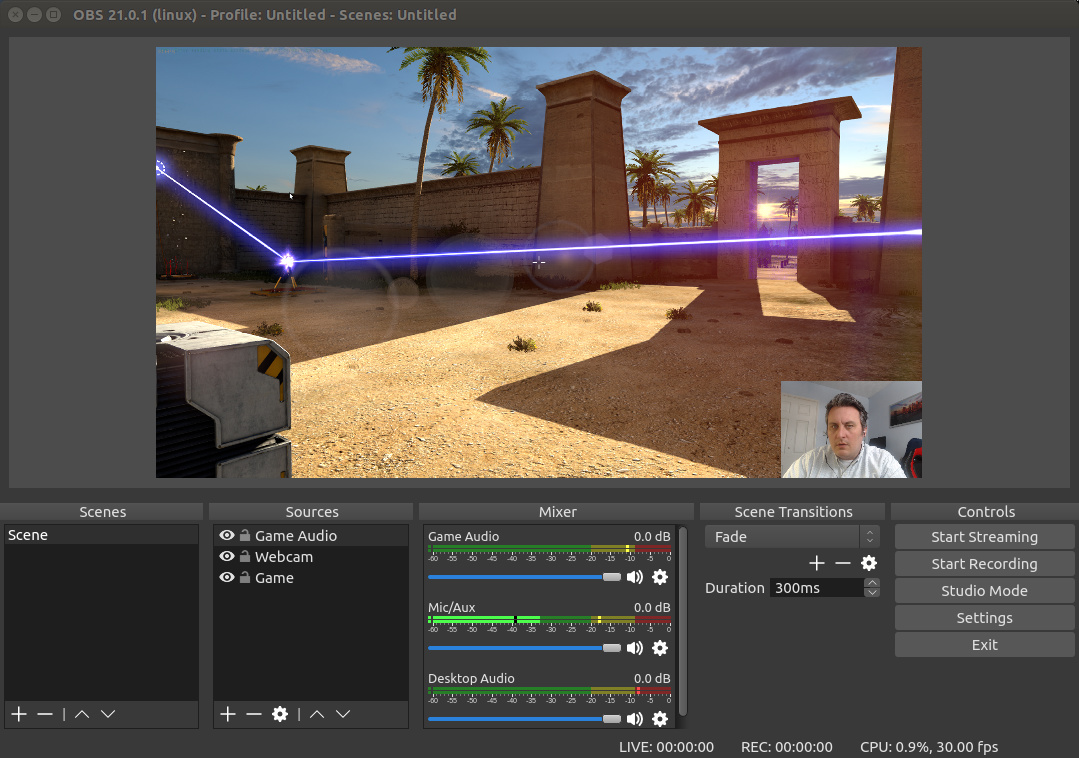
Scenes
Next to Sources, you will see Scenes. This is where you can create different combinations of sources that you can transition to during a live stream. For example, you can have one scene be a game-capture and a video-capture device. This is your basic video-game-streaming look.
Then, you can have another scene that is just a video-capture device, which can show your webcam full screen, for when you are not playing and you are interacting with your chat.
Audio Mixer
The Audio Mixer window shows the current audio inputs into OBS. Mac users will need to install a third-party app that allows OBS to capture the desktop audio.
If you want to change any audio settings, go to the Audio Mixer, click on Settings on the audio track that you want to adjust, and then click on Properties. Here, you can adjust the source of the audio.
Starting a stream or recording
In Controls, you can choose to Start Streaming if you are about to play a game. Or, click on Start Recording if you want to record your screen. While you are recording your screen, it will say Stop Recording to end your screen recording.
