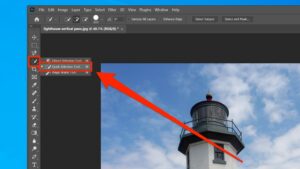
Here is a guide on how you can use the quick selection tool in Photoshop. This tool is useful when you want to adjust or invert the colors of an object in the image or clone a certain part of the photo. The quick selection tool works best with objects or backgrounds that are a little more complex.

Step 1: First, duplicate the layer. This keeps a non-destructive version of the image available for reference. To do this, in the layers panel, left-click and drag your background image down to the Create a new layer icon.
Now, click on the layer-visibility icon for the background layer. This will make the background layer hidden.
Locate the quick selection tool in the tools panel on the left side. Depending on what workspace you are in, the organisation of the tools may look slightly different. It is recommended to use the Essentials workspace, which is Photoshop’s default.
The fourth tool down is where the quick selection tool is located. To find it, you may need to right-click to expand this tool submenu. Then, select Quick Selection Tool.
Adjust your quick selection brush size to something smaller than your background but not too large.
Use the left and right bracket keys to adjust the size or the pull-down menu at the top.
Make sure that you have selected your visible layer and start selecting parts of your background until the background is fully selected.
If the selection has extended beyond the background, you can refine that, as well. To add or remove some of the selection, use the tools at the top labelled Add to selection and Subtract from selection. Depending on what you need to do, use your bracket keys or the drop-down menu to adjust the selection tool size. Use a brush size that is smaller than the size of the selection area that you are removing.
Now, click in the area where you want to add/remove the selection that has expanded past the background. Repeat this with any discrepancies with the entire selection.
Go to the Select drop-down menu and click on Select and Mask. This will open up the Select and Mask workspace, where you make adjustments to your selection to refine it. Adding a slight feather is always a good starting point and will help make your image more seamless with any background you put behind it.
Go down to Output Settings, and make sure that Output To has Layer Mask selected. Click on OK. Your background is now removed and you can save this as a PNG file type, which keeps the background transparent and saves a cutout version of the image.


