Steam is without a doubt the most popular gaming platform on PC, with the largest game catalogue and user base. It also has a quite large VR gaming library. You clearly want to be able to enjoy the games offered by the Oculus Quest 2 VR headset without needing to utilise your computer if you have one. However, you might wish to try out some of your Steam-based VR games. This is especially true if you already possess a copy of a game on Steam and don’t want to pay for it again. Thankfully, you don’t have to stick to certified Oculus titles if you want to play Steam VR games on your Quest 2.
To play Steam VR games with your Quest 2 headset, there are two options: using a cable or going wireless. You’ll get the optimum performance and stability if you use the official five-meter Oculus connection cable. Nonetheless, it costs $80, which is a lot for a USB cable. Other cables will work, but make sure they’re USB 2.0 or better, and that they have a USB Type-C connection. If required, you obtain an adapter for your PC.
For the wireless version, you’ll need to buy “Virtual Desktop” from the Oculus Store, not the Steam version. This programme will set you back $20 and may or may not function well for you. Users report varying levels of performance, thus your mileage may vary depending on your configuration.
Whatever connection option you choose, you’ll need a computer capable of running VR games, as well as Steam and Steam VR installed. The Steam shop has a free version of Steam VR. You’ll also need to have the Oculus software on your PC.
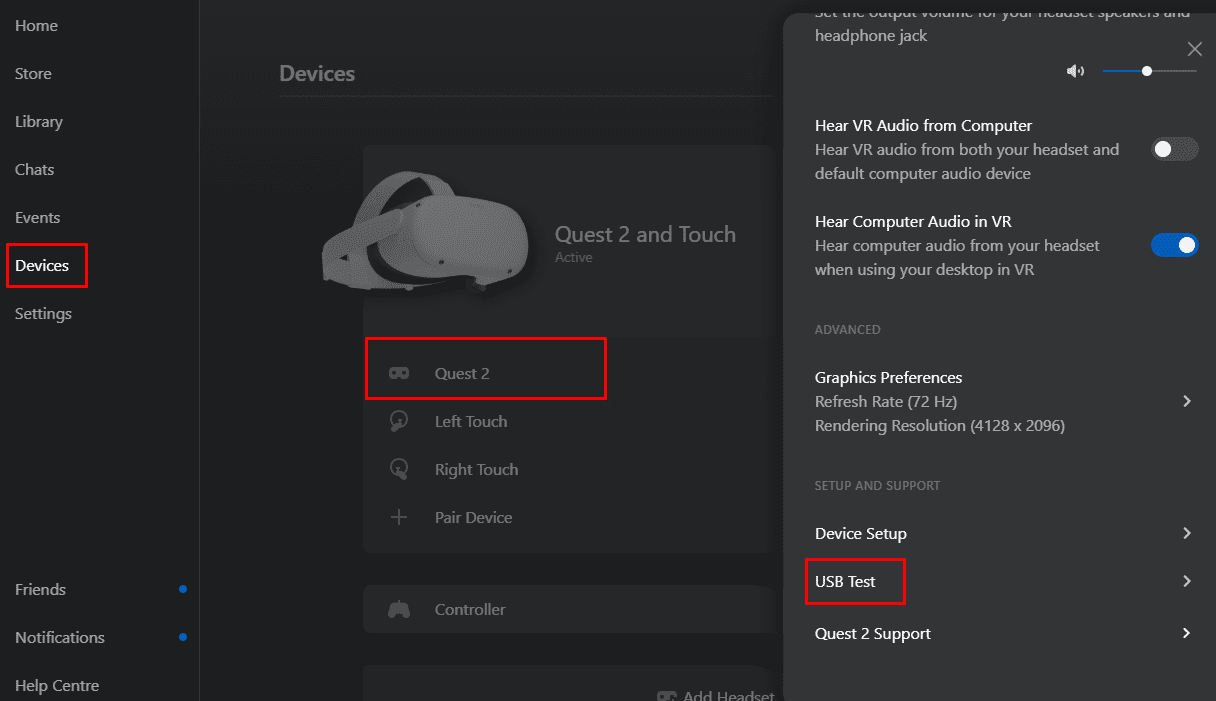
Connect your Quest 2 headset to your PC using your connection cord once the aforementioned programme is loaded. The Oculus app should detect your headset as a Quest 2 once it’s connected and run a brief performance test on your connection. This test ensures that the data transfer rate between the devices is fast enough for a VR experience. Unless you’ve linked it through a sluggish adapter, the official Oculus connection cord will pass this without a hitch. Third-party wires might not be appropriate.
When the performance test is finished, put the Quest 2 headset on. If a window appears in the headset asking you to “Allow access to data,” select “Deny,” as granting this permission may result in disconnection difficulties. To connect, select “Enable” on the following window.
When the performance test is finished, put the Quest 2 headset on. If a window appears in the headset asking you to “Allow access to data,” select “Deny,” as granting this permission may result in disconnection difficulties. To connect, select “Enable” on the following window. If it doesn’t appear, click the Oculus button on the right controller and select “Oculus Link” from the “Connections” menu to enter the settings.
There will now be a new Oculus link homeroom. To access the Steam VR home, go to the home screen and select “Steam VR.” Steam VR games may now be launched directly from the Steam VR home. To access the Steam games list, press the “Menu” button on the left controller.
If you wish to connect wirelessly, you should do everything you can to ensure that your connection is as strong as possible. Ideally, use an ethernet connection to connect your computer to the router, and then make sure your headset is linked to the 5 GHz Wi-Fi network. Because signal quality is decreased by distance and especially walls, the closer your headset is to the router, the better the connection will be. You’ll also need the gear and software listed above, sans the connection cord.
To connect wirelessly, put on your Quest 2 headset, then go to the Oculus store and buy and install the “Virtual Desktop” software.
Remove the headset and sign into the Oculus app on your PC while it instals, then install the Virtual Desktop streamer software. When the installation is finished, open the app. After that, click “Save” and input your Oculus username. You may also wish to customise the settings on the right to suit your needs.
Install and start the Virtual Desktop Streamer software on your PC, then enter your Oculus login and password. Put the headset back on and start the Virtual Desktop app while the streamer app is running on your PC. From the list of possible connections, choose your computer.
Once you’re connected, click the menu button on the left controller to access the Virtual Desktop menu. To launch the Steam home, click “Start Steam VR” from the left menu. Alternatively, you may use the “Games” option to start a specific Steam game.
For your Quest 2 VR headset, the Oculus shop has a wide selection of titles. You could already have several VR games in your Steam collection if you have a strong gaming PC. It’s understandable that you don’t want to have to pay for them again in order to play. You can connect your Quest 2 headset to your computer by following the instructions in this guide. You may now play your Steam games with a link cable or wirelessly, whichever you want.


