Know How to Add Email Signature in Microsoft Outlook
When it comes to the long listing of emails at offices and business works, there is only one software that helps us achieve the unachievable- Outlook. Apart from the features of sending and receiving emails, Outlook also opens you to other services like managing the calendar, schedule, and share appointments. Moreover with Outlook you can also create multiple contact lists.
If you talk about Outlook furthermore you must also know that there are a variety of platforms on which Outlook can be accessed, however it is a nerve wracking task to look out for and utilize the signature feature. So if you have been meaning to find the most straightforward ways.
Here is how to Add Email Signature in Microsoft Outlook-
Let us first know what is a Signature in Outlook
Signatures are one of the most important factor when it comes to professional business emails. In simple words A signature is simply an information tile which represents who the sender is. A signature could contain detail names such as name, designation, company address, contact number, and email id. You can play with your signature name just as you want, if you want to go with the all names so be it. Or in other cases you can simply keep it short and crisp.

How to Add Email Signature in Microsoft Outlook
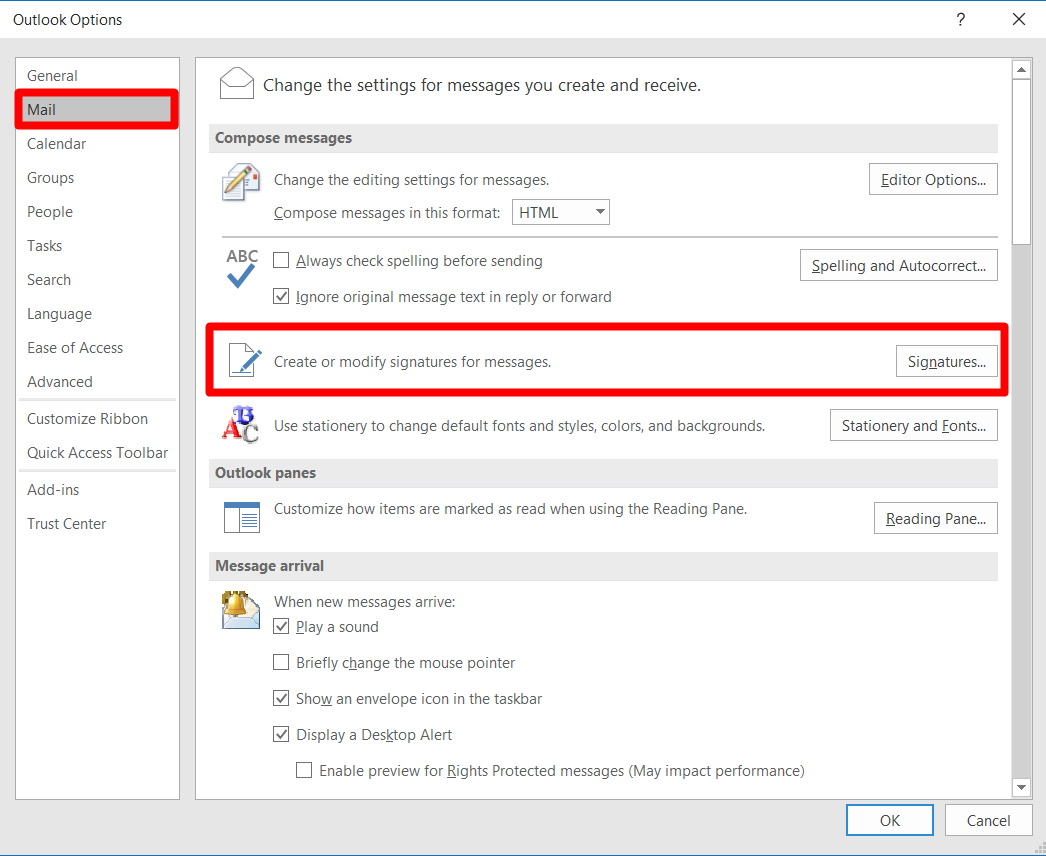
- If you wish to create your own signature on Windows, you will first have to launch the Outlook app. Later you will have to click on the icon of Signature and from there you can choose Signatures.
- You will see an option of Select Signature to edit. Under that option of New.
- When the dialogue box appears you have to type the signature you wish to you and you’ll be good to go.
- Don’t forget to click on OK when you are done with the mentioned steps.
On Outlook Mobile App
- When you wish to Add Outlook Signature on your Mobile App make sure to download the Outlook app first. You can do so easily by checking it out on Play Store or the App Store. When the app is downloaded be sure to log in to your Microsoft Outlook Account.
- On the top right section of your screen, you will find a menu. Keep scrolling until you find the option of settings and once you do tap on that.
- From all the options available tap on Signature. You will then have to erase the default text in the dialogue box which says ‘Get Outlook for Android’. After removing the text type your on Signature field.
- When you are done with typing your Signature your last option has to be to save the changes and just like it, you’re done!


