


Figure out How to animate on procreate. In this instructional exercise, I’ll show you the bit-by-bit course of making a dynamic text movement.
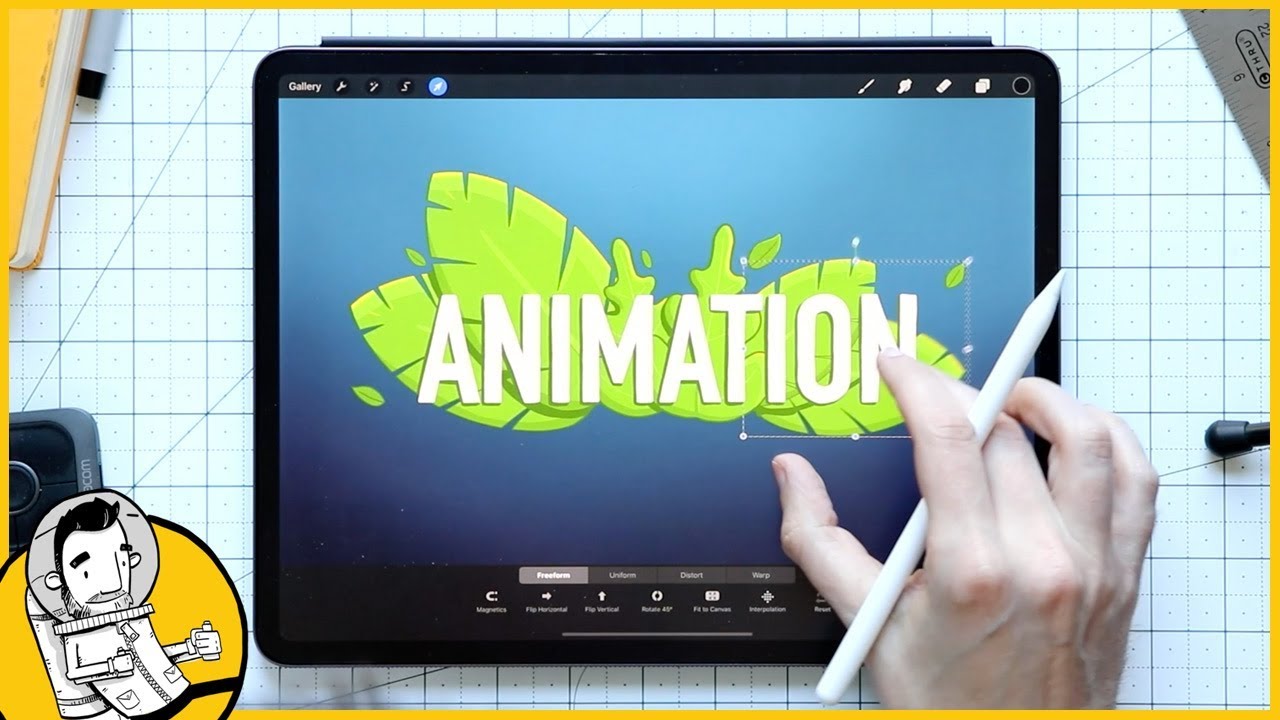
How to animate on procreate
- The most effective method to make a custom material in Procreate
- The most effective method to involve a textual style in-text activity in Procreate
- Step by step instructions to make and utilize a layered veil in Procreate
- The most effective method to make a cut-out veil in Procreate
- The most effective method to add accents to movement in Procreate
How to animate on procreate: Instructional exercise Assets
The accompanying resource was utilized during this Procreate activity instructional exercise:
- Nala Junior
- The most effective method to Start a New Document in Procreate
Stage 1
Go to Procreate > + and you’ll get a drop-down menu. Click on the Custom Canvas symbol at the top.
Stage 2
Make a Custom Canvas with these aspects:
- Fine art Name: Procreate Animation
- Width: 1700 pixel
- Stature: 1000 pixel
- DPI: 300
Stage 3
Under Color Profile, roll out the accompanying improvements:
- Shading Profile: sRGB
Step by step instructions to Add Text to Procreate
Stage 1
Go to Layers and pick foundation layer and enter the accompanying hexadecimal code:
- Shading: Dark Blue #002039
Stage 2
Guarantee you have a pink shading choice and afterward pick the Text Tool.
- Shading: Pink #ff4797
Stage 3
Under the Text Tool, type a word with these settings:
- Textual style: Nala Junior
- Size: 200 pt
- Following: 3.2%
Instructions to Prepare the Text for Animation in Procreate
Stage 1
Turn on snapping.
Stage 2
At the point when you move the message with Snapping on, yellow rules will show up on-screen, and this shows that the message is focused.
Stage 3
Rasterize the text layer.
Stage 4
Copy the rasterized layer.
Instructions to Create the First Frame for Animation in Procreate
Stage 1
On the base most Hi layer, turn on the layer cover.
Stage 2
Make one more layer on top of the layer cover.
Stage 3
Cut that layer to the base most Hi layer.
Stage 4
Rename the layer “Yellow”.
Stage 5
Bunch these layers (base most Hi layer, Layer Mask, Yellow cut layer) and rename it “1”. This will be our first edge in the liveliness.
Stage 6
Bring down the Opacity of the highest layer, which will go about as an aide until further notice.
- Obscurity: 40%
Stage 7
On the base most Hi Layer, go to the layer cover and fill it with dark.
- Shading: Black #000000
Stage 8
Turn on Animation Assist.
Instructions to Use a Layer Mask in Text Animation
Stage 1
The principal gathering will remain all things considered. We will copy the first gathering in quite a while board. In the subsequent gathering, go to Layer Mask and ensure you have a white tone chosen.
- Shading: White #ffffff
Stage 2
In the subsequent gathering layer cover, begin uncovering the letter with the brush.
- Brush: Monoline under Calligraphy
Stage 3
Copy the subsequent gathering and rename it “3”.
Stage 4
Go to Layer Mask in the third gathering and begin uncovering the letter further.
We need to rehash the interaction until the whole letter becomes noticeable.
Step by step instructions to Use a Clipping Mask to Complement the Effect in Text Animation
Stage 1
In the Animation board settings, roll out the accompanying improvements:
- Onion skin outlines: 7
- Onion skin haziness: 32%
Stage 2
Go to the “Yellow” layer in the subsequent gathering, and guarantee that you have the yellow tone chosen.
- Shading: Yellow #f6be0b
Stage 3
On a similar layer, make a couple of little spots any place you uncovered the word before.
Stage 4
Go to the third gathering and ensure that you are on the Yellow layer.
Stage 5
Make a couple of greater spots on a similar layer.
Stage 6
Additionally, do this for every one of the gatherings, ensuring that the yellow dabs increment and afterward decline, as displayed underneath.
Stage 7
The last gathering, which turns out to be 10 here, will have no yellow dabs. Click on the tenth gathering on the Animation board. Set the Hold span to 6 edges.
Instructions to Add Accents to an Animation in Procreate
Stage 1
Go to the highest aide layer and guarantee that the Opacity is turned around to 100%. Then, at that point, copy the layer.
Stage 2
Make a little, similarly dispersed scramble around the word in the second-last layer, with the accompanying settings:
- Brush: Monoline
- Brush Size: 1 px
- Shading: Cream #fdf0d8
Stage 3
Copy the twelfth layer and rename it “13”.
Stage 4
On the twelfth layer, make runs in continuation to our previous emphasis.
Stage 5
The interaction should be rehashed for 13 odd layers.
Stage 6
Change the settings of the Animation board as displayed beneath:
- Circle: Ping-Pong
- Outlines each second: 15
Instructions to Save the File for Animation in Procreate
Stage 1
Go to Actions > Share > Animated gif.
Stage 2
Click on Export and save to the ideal area.
Congrats, You’re Now Done!
In this Procreate liveliness instructional exercise, you figured out how to energize in Procreate. We began by making a rasterized layer from our Nala Junior Font, and afterward, we added a layer cover to uncover the letters in this liveliness with Procreate. We additionally added a cut-out cover on top of that to supplement the impact. Ultimately, we added a couple of accents to spice up the next activity. Furthermore, now you know how to vivify text in Procreate!


