If you often email the same set of people, creating an email group in Outlook is a huge help.
Every time you compose a group email, you won’t have to manually add the member’s email addresses.
How, though, do you create one?
I’ll explain what an Outlook group is in this article, along with how to make one using your Microsoft Outlook contacts. I’ll also demonstrate how to modify these groups and email them.
How to Make a Microsoft Outlook Email Group
Depending on whether you’re using Windows, Mac, or the Outlook Web App, the process for configuring an Outlook contact list differs a little (OWA).
Let’s examine each platform’s instructions for creating a distribution group:
For Windows Platforms, see A.
Following are some simple steps to make a distribution list in Outlook for Windows:
1. Step 1
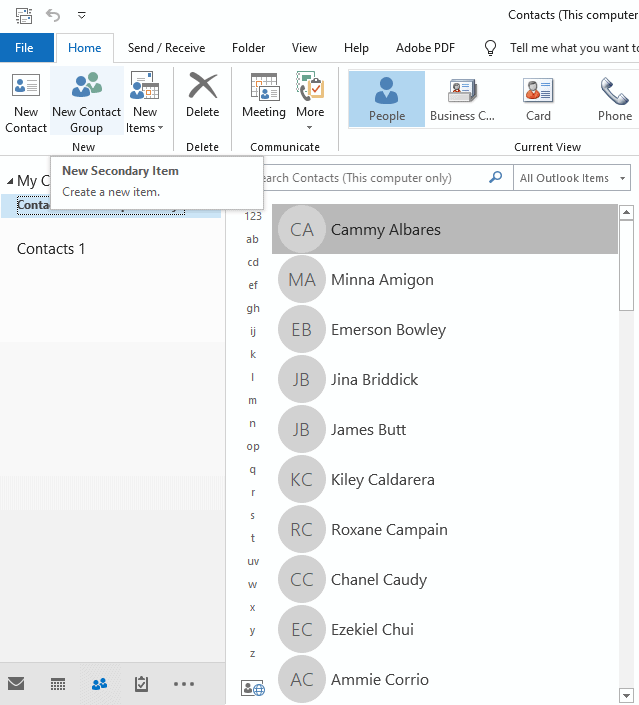
To start, open Outlook and then create a new group. then click the People button in the navigation pane (the small icon to the bottom left of your screen).
Alternately, you can choose from the Home menu New Items > More Items > Contact Group.
2. Step 2
Choose the folder where you wish to save the contact group under My Contacts. The new contact group is typically saved in the contacts folder.
3. Step 3 From the Home tab in the top ribbon, choose New Contact Group.

4. Step 4: In the name field, give your contact group a name.
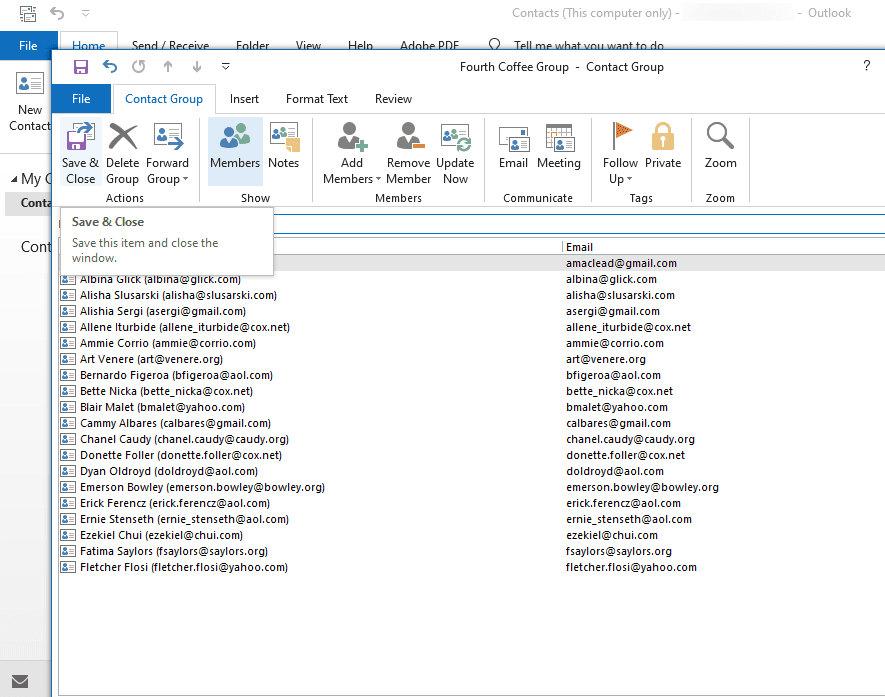
5. Step 5: Select “Add Members” and then “From Address Book,” “From Outlook Contacts,” or “Make a New Contact” to add member emails.
What each of them means is as follows:
From Address Book – This often has the email addresses of those who work at your company.
Outlook Contact List: This mostly contains a list of outside contacts that you’ve saved in a Microsoft Outlook contacts folder.
Create a New Contact – Using this, you can add a new contact to the list.
If the list of contact emails only includes a few employees from your business, you may also add more employees by using the global address list for your organisation. (A global address list is an electronic address book that includes all of the contacts for a company.)
Repetition of the process is simple; simply choose the list and click Add members the next time you need to add member emails to your list of professional or personal contacts.
6. Step 6: The Members box will vanish after you have selected members and are done configuring your contact group.

You can test your group by sending a fresh email to the members of your group contact list after you click Save.
B. For Platforms on Mac
To create a group in Outlook for Mac devices, follow these steps:
1. Step 1: Launch Outlook and select People from the navigation bar.
2. Step 2 Next, use the navigation bar to choose Home > New Contact List to create a new group.
3. Step 3: When the contact group box appears, give your list of contact emails a group name.
4. Step 4: To add a contact to the contact list, click Add just below the navigation bar and choose members by entering their email addresses.
You can keep adding more people to your new group through the members’ box.
5. Step 5: The member’s box will vanish once you’ve finished choosing members and creating your contact list by clicking Save & Close.


