Introduction:
In today’s digital age, smartphones have become an essential tool for navigation, making it easier than ever to find your way around. Apple’s iPhone, equipped with advanced GPS capabilities, allows users to effortlessly pin locations and access them later. Whether you want to remember a fantastic restaurant, a hidden gem, or simply find your way back home, this guide will walk you through the process of pinning locations on your iPhone with precision and ease.
Enable Location Services:
To begin pinning locations on your iPhone, ensure that Location Services is enabled. Open the Settings app, scroll down, and tap “Privacy.” Next, tap on “Location Services” and make sure the toggle switch is turned on. This setting allows your iPhone to access location data and provide accurate results.
Open Apple Maps:
Apple Maps is the default navigation app on your iPhone, offering a user-friendly interface and comprehensive features. Apple Maps will load, presenting you with a map view.
Search for Your Desired Location:
In the search bar at the top of the Apple Maps interface, type the name or address of the location you wish to pin. As you type, Apple Maps will provide suggestions and auto-fill the search query. Tap on the correct suggestion to proceed.
Drop a Pin:
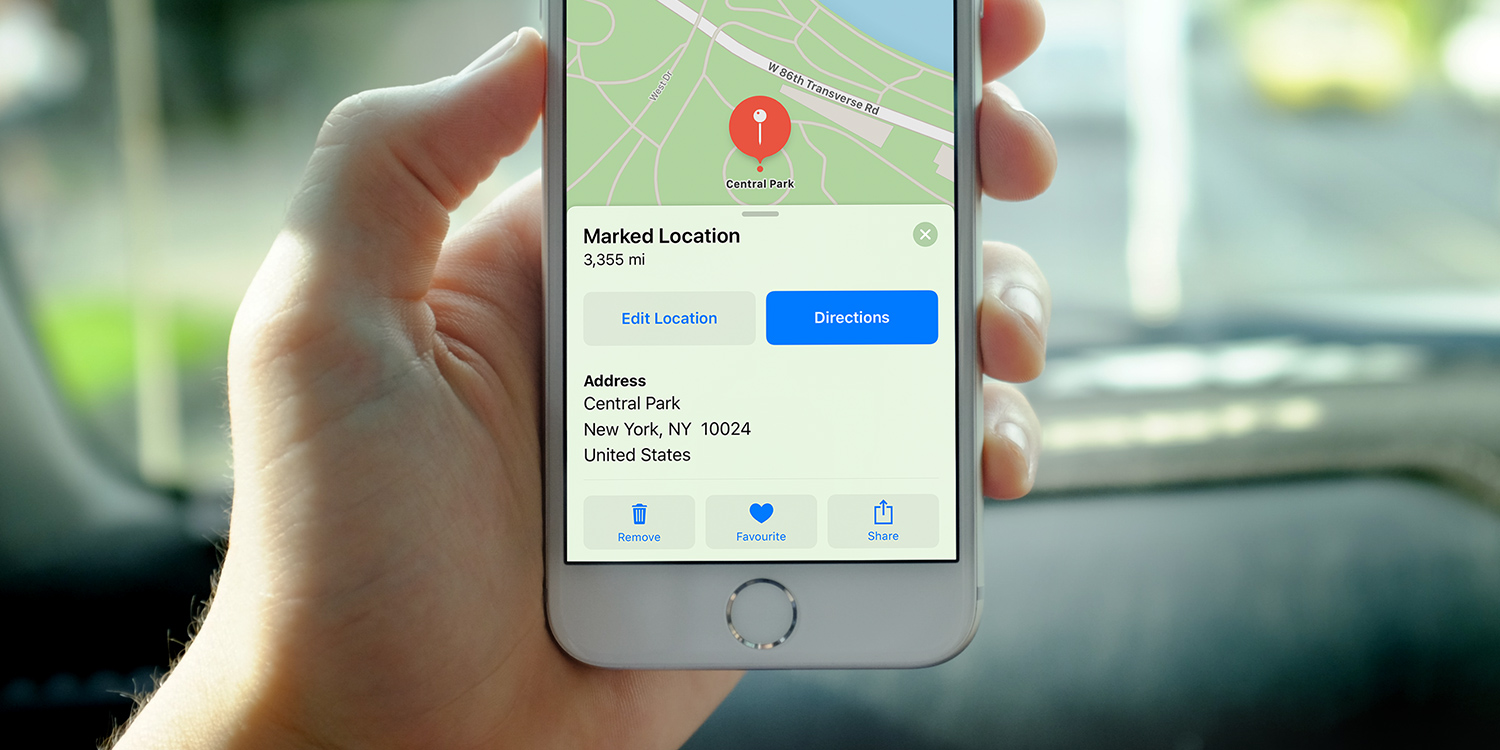
Once Apple Maps locates your desired location, you’ll see a red pin indicating the spot. Tap and hold the red pin to activate the pinning options. A red marker will appear, and the address will be displayed at the bottom of the screen.
Customize the Pin:
To enhance your pinning experience, Apple Maps offers customization options. Tap the red marker once to bring up a small menu. Here, you can add a label or title to the pinned location, such as “Favorite Restaurant” or “Must-Visit Place.” You can also assign a color to the pin, making it easier to identify later.
Save the Pinned Location:
After personalizing your pin, tap the “Add to Favorites” button at the bottom of the screen. This action will save the location to your Favorites list for easy access in the future. Alternatively, you can tap “Share” to send the location to others via messages, email, or various social media platforms.
Accessing Pinned Locations:
To view your pinned locations later, open Apple Maps and tap the “Search” bar at the top. Scroll down to find the “Favorites” section. Here, you will see a list of all the locations you have pinned. Simply tap on a location to view it on the map, access additional details, or get directions.
Removing Pinned Locations:
If you no longer need a pinned location or want to declutter your Favorites list, removing a pin is a breeze. Open Apple Maps, tap the “Search” bar, and scroll down to the “Favorites” section. Swipe left on the location you want to delete, and a red “Remove” button will appear. Tap the button, and the pinned location will be removed from your list.
We will explore five essential tips to help you master location pinning on your iPhone, ensuring you never lose track of your favorite spots or essential destinations.
Accessing the Maps App
The first step to pinning locations on your iPhone is to access the Maps app. It comes pre-installed on all iOS devices and can be found on the home screen. Simply tap the Maps icon to launch the app. If you can’t find it, you can swipe down on the home screen and use the search bar to locate it quickly.
Finding the Desired Location
Once you have the Maps app open, you need to find the location you want to pin. You can do this by either searching for the place directly in the search bar at the top or by manually exploring the map by zooming in and out and moving around with your finger. Use familiar gestures like pinch-to-zoom to get a closer look at the map and locate your desired spot accurately.
Dropping a Pin
When you have found the location you want to pin, the next step is to drop a pin on it. Simply tap and hold your finger on the screen where you want to drop the pin. A red pin will appear at that location, accompanied by a popup with detailed information about the place. This information includes the name, address, and other relevant data about the location.
Customizing the Pin
To make your pinned location more recognizable and personal, you can customize the pin. Tap on the pinned location, and a small information card will appear at the bottom of the screen. Swipe up on this card to reveal additional options. Here, you can add a custom name or label to the pinned location, making it easier for you to identify it later. You can also add notes or even assign the location to a specific contact in your phone.
Creating Collections
To stay organized and easily manage multiple pinned locations, take advantage of the Collections feature. From the information card of a pinned location, tap on the “Add to” button. This will allow you to create a new collection or add the location to an existing one. Collections are like folders where you can group related places together. For instance, you can create collections for restaurants, vacation spots, or favorite hiking trails. This feature ensures that your pinned locations are neatly categorized and easily accessible.
Conclusion:
Pinning locations on your iPhone with Apple Maps is a handy feature that helps you remember and navigate to your favorite places. By following this step-by-step guide, you can effortlessly save, customize, and access your pinned locations, making exploration and organization a breeze. Get ready to explore the world at your fingertips!