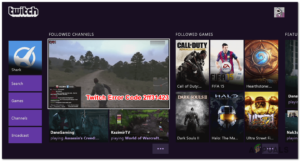
Streaming on Twitch via your Xbox One is simple.

Downloading Twitch and activating Xbox
- First, you need to have the Twitch app installed on your Xbox. If it is not installed, you can download it from the Xbox store.
- Open the Twitch app, and sign in to the Twitch account you want to stream from.
- Follow the steps on the screen to activate your Xbox and sign in to your Twitch account.
Streaming settings
Now, go over the settings within the Xbox to allow proper streaming.
- Click on the Xbox button on your controller.
- Then, go to the profile and system tab on the far right.
- Go down and click on Settings.
- Go to Account Settings on the left and select Privacy & online safety on the right.
- Click on Xbox privacy.
- Click on View details & customise.
- Select Online status & history.
- Under the Others can see if you’re online tab, make sure that Everybody is selected.
- Go back one page to your Xbox privacy settings page again, and this time, select Game content.
- Under Broadcast gameplay, make sure that Allow is selected.
- Under You can share content made using Kinect or another camera, make sure that Allow is also selected.
Streaming with a webcam
- To stream with a webcam, make sure that you have a USB style webcam plugged right into your Xbox.
Broadcasting your stream
- Return to your Twitch app, and from here you can begin broadcasting your stream.
- At the top, click on Broadcast.
- Here, you can adjust your settings, like your camera position on the screen, microphone volume, and stream resolution.
- Lable your stream session and click on Start Streaming,
- Once you begin playing a game, Twitch will automatically switch to broadcasting your screen, and your webcam and microphone will be enabled. You are now live on Twitch for all your viewers to see.


