

Around 10% of disk space always has to be free for your Mac to run smoothly. And if you’re reading this, that percentage must be way lower on your computer. You’re probably already experiencing slow processing, glitching, and crashing apps. But worst of all, you’re suffering from the utterly annoying “Your startup disk is almost full” popup. Hate it.
Jokes aside, you need to fix the problem before it gets worse. Here’s how to free up disc space on Mac:
-
- Use your Mac’s built-in tools for managing storage
- Manually clear out the trash
- Clean up that desktop mess
- Remove extra language files
- Get rid of duplicate files
- Delete iTunes backups
- Delete Mail attachments
- Archive messages and delete junk mail
- Compress files and folders
- Grab an external drive
How Do I Free Up Space on My Mac?
There are two approaches to freeing up space on your disk drive: using pre-installed software or manually.
If you don’t want to spend hours on the tedious task, opt for a reliable tool that will clean your Mac for you. This will speed up the cleanup and guarantee you won’t accidentally delete critical files.
A manual cleanup can be as simple as clearing out the Trash and deleting old junk. On the other hand, it can involve painstaking tasks like searching for duplicate files and deleting useless language packs.
Either way, we’ve gathered ten tips for freeing up space on your disk drive for you to choose from.
1. Use your Mac’s built-in tools for managing storage
First, find out what types of files are clogging up your storage disk. To do this:
- Click on the Apple logo in your screen’s upper-left corner.
- From the dropdown menu, select About This Mac.
- Click on the Storage tab.
You’ll see a color-coded view of the different types of files filling up your disk. This window also provides access to your Mac’s storage management tools.
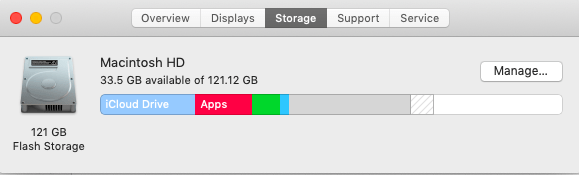
Clicking on the Manage button will take you to a window that offers tools for freeing up disk space.

- Store in iCloud
Clicking on this option opens a popup window that lets you choose the type of files you’d like to store in the iCloud Drive. You can transfer messages and photos, as well as files from your desktop and documents. Your Mac will keep recently opened files and space-saving versions of photos in the local disk, so you can still work on them offline.
The caveat is that iCloud only offers 5 GB of free storage. You will have to pay for additional storage space.
- Optimize Storage
Clicking on the Optimize button lets you automatically delete movies and TV shows you’ve already watched, particularly those you’ve purchased from Apple. Simply click on the download icon next to the media files to redownload them. Don’t worry, you won’t have to pay for the same ones again.
This tool also ensures your Mac is only storing recent email attachments. You can manually download older attachments when you need them.
- Empty Trash Automatically
Unless you manually delete files in the Trash, they will accumulate over time. Turning on the Empty Trash Automatically option tells your Mac to permanently delete files that have been in there for more than 30 days.
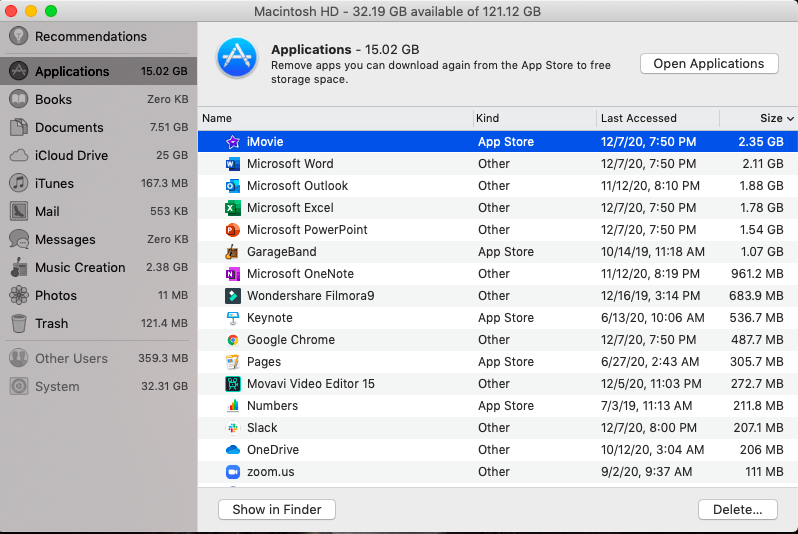
- Reduce Clutter
Easily identify large files and those you no longer need. Simply click on the Review Files button and choose relevant file locations or categories on the sidebar.
In most categories, you can delete files directly from the popup window. Others at least show the size of the files, allowing you to do targeted purging.
2. Manually clear out the trash
The automatic option only clears out your trash after 30 days. Waiting this long can result in a mountain of trash that can slow down your Mac. So, go ahead and empty it yourself. Your trash is sitting on the dock, requiring only a few clicks to clean up.
Applications like iMovie, iPhoto, and Mail also have their own Trash. Make sure you take the time to clean them as well.
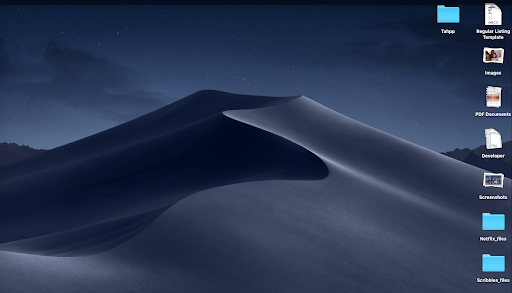
3. Clean up that desktop mess
Your messy desktop is taking up space and slowing down your Mac. And you’re not fooling anyone: there’s no way you can find a shortcut to anything on that cluttered screen. Most of these files and shortcuts will have to go.
If your Mac is using macOS Mojave or Catalina, control-click on the desktop and select Use Stacks on the popup window.

Clicking on Use Stacks instantly sorts out your files. Your desktop will be much less of an eyesore, plus deleting files will be more efficient. Start with the countless screenshots!
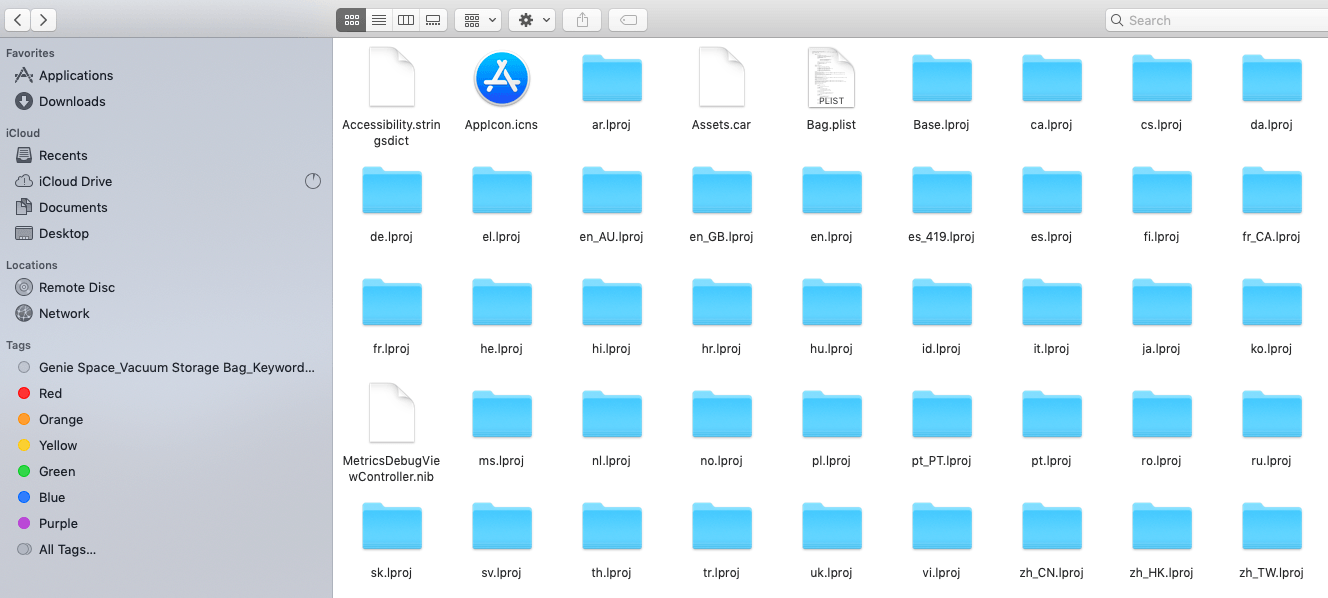
4. Remove extra language files
Most apps are bloated with dozens of language packs. You don’t use Russian, Swahili, or Hindi on Skype, but you need your precious disk storage space.
To delete useless language files:
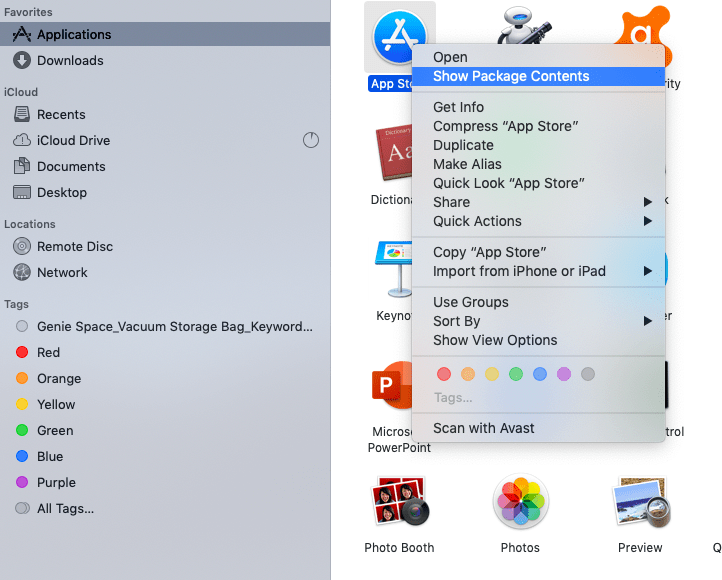
- Go to Finder > Applications and right-click on an app.
- Select Show Package Contents, click on Contents > Resources.
- Start purging files ending in .Iproj.
Of course, keep the languages you actually use, and if learning Swahili is your new year’s resolution, keep that too.
5. Get Rid of Duplicate Files
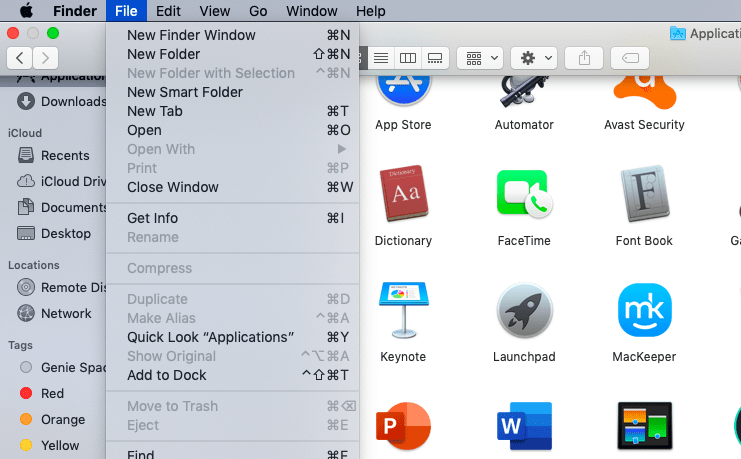
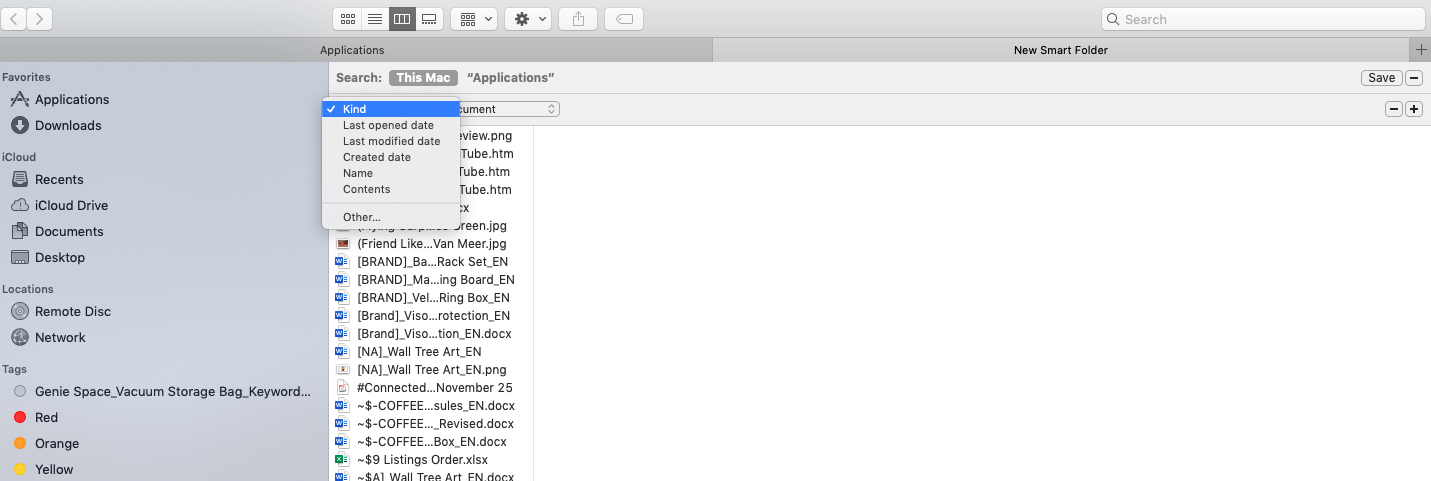
You can manually search for duplicate files using Smart Folders. To do this:
- Open Finder, navigate to File and select New Smart Folder.
- Click on the + button in the upper-right corner.
Now, you can quickly sort files by name, kind, contents, and date it was created or modified. This makes spotting duplicates much easier.
6. Delete iTunes backups
iTunes backups may be weighing down your Mac. Remove them by going to Finder and selecting your Apple device. Click on Manage Backups, choose old or heavy backups, and click Delete Backup.
7. Delete mail attachments
Files are stored on your Mac every time you open attachments in your built-in Mail app. Before you know it, they’ve eaten up a huge chunk of your storage. You can delete the attachments manually by clicking on a message and selecting Message > Remove Attachments from the menu bar. Click on Sort by Size so you can work on larger files first.
8. Archive messages and delete junk mail
Email archiving moves data to a cloud server, allowing you to free up space on your local storage. To archive an email, right-click on the message and select Archive. Unlike deleted messages, you can restore archived data when you need them.
Getting rid of junk mail also frees up some space. To do this, open your Mail app, click on the Mailbox tab, and select Erase Junk.
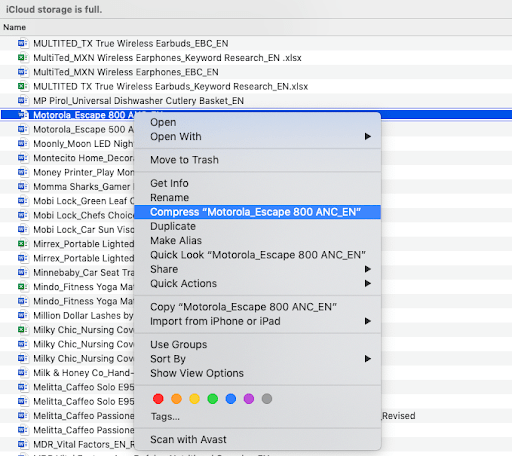
9. Compress files and folders
You can also archive or compress files and folders on your Mac. Compressed files consume less disk space, making it an ideal way to store files you rarely use. They’re also easier to send over the internet.
To archive a file or folder, control-click on it and select Compress [Name of File] from the dropdown menu. Your file will be converted into a .zip version. Compressing multiple files will result in an Archive.zip version. To unzip, simply click on the .zip file or folder.
Note that Mac still keeps the original files after compressing them, so make sure you take the time to delete them.
10. Grab an external drive
Sometimes, there’s just no other option. You can exhaust all your cleanup options and still deal with a lack of storage. Fortunately, there are plenty of external drives to choose from. Get one that offers massive space for a relatively low price, but don’t buy the cheapest ones – you wouldn’t want to keep your valuable files in a storage you can’t trust. And to make the most out of the drive’s space, compress files before transferring them.
And that’s it. We hope some of these tips will help you clean your Mac from clutter (they sure helped us). You can do it automatically, manually, or sign up for a special cleanup software tool. Either way, make sure you face the problem head-on!


