YouTube Live can be an extremely effective platform for gamers, businesses, social streamers, and aspiring influencers alike. However, the problem is that starting a YouTube live stream is not exactly the most straightforward of processes. To do so, you can some of the tips given below.

For starters, live streaming is disabled on new YouTube channels by default. To enable it, you must first verify your YouTube account. This is a relatively simple process. Choose your country of residence, your preferred verification code delivery method, and enter the number of a mobile phone device that you have access to. To verify your account, you will receive a six-digit verification code on the phone number that you gave to YouTube. Type that code in.
Following this, enable live streaming through the pages for either channel features or YouTube Studio live events, or through the Live Control Room. For live streaming to activate on your account, you will have to wait for 24 hours.
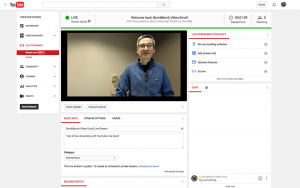
The easiest and most convenient way to live stream on YouTube is straight from your web browser using a built-in or external USB web camera. A webcam might meet your requirements as a content creator if all you want to do is share your thoughts and communicate and engage with your audience in real-time. It is also possible to live stream through your browser with a more high-end camera, such as a DSLR or a digital camcorder. For this, you will need to have a USB capture card to bring the video signal into your computer. Only then will YouTube be able to recognize the camera as if it were a plug-and-play webcam.
Once you have done your work regarding the camera, use the following steps to live stream through YouTube through your web browser:
- Log into your YouTube account and click on the button that says “Create a video or post”.
- There will be a drop-down menu. Choose the option that reads “Go Live”.
- Give YouTube and your browser any required permissions for live streaming (these would include access to your camera, microphone, etc.) if prompted to do so.
- In the Live Control Room, make sure that “Webcam” is selected in the navigation bar at the top of your screen.
- Give your a title to your live stream, select a privacy setting per your convenience (the options public, private, or unlisted), and choose whether you would like to live stream now or schedule an event for a later time slot.
- Click on “More options.” Choose the appropriate camera and microphone options from the drop-down menus if they are not listed by default.
- Press “Advanced settings” to toggle chat, age restriction, and monetisation (this is available only for members of the YouTube Partner Program).
- Click on “Next” and pose for the thumbnail. Hover your mouse over the thumbnail to bring up options to take another picture or upload a custom thumbnail from your computer.
- Click on “Go live.”


